Thursday, November 28, 2013

Pad Prik Khing Gai (Thai Stir-Fry with Roasted Chile Paste)

Okay everyone, time for a crash course in ordering from Thai menus.  You may think you understand it, but I have concluded that none of us westerners really know.  Well allow me to clear at least a couple of things up, in a section I like to call:

Culturally Insensitive Language Training

In Thai, there are a number of words which are used strangely, and a small number which you can always hang your hat on.  I think I've finally got a small piece of this figured out.  So let me lay some words on you, and you can try to remember them so you don't make the same restaurant ordering mistakes that I did:

"Pad" - stir-fried.  Not an especially helpful word.
"Gai" - chicken.  Pretty straightforward.
"Prik" / "Phrik" - chile peppers.  Got it.
"Khing" - ginger.  Wait, galangal.  Wait, all of the above.  Ah, here's the problem - people who try to translate this don't know what they're talking about!  What they mean to say is that "khing" most likely means rhizome, which in turn encompasses both ginger and galangal.  In this context, it means galangal.

So, when you see the phrase "prik khing", you may think you're getting chile and ginger sauce, when in fact you are not.  This is even more confusing when you consider that there is a dish called "pad khing", which IS a dish of stir-fried ginger and other vegetables (recipe coming soon).  But no, prik khing refers to a paste made of roasted chiles and assorted aromatics, to include galangal and lemongrass.  If you just pick up a can of the stuff, you will see an almost identical list of ingredients compared to red curry paste, but this paste is prepared in a completely different way, which I know nothing about, but which I gather involves roasting the chiles first, much like you would do to create chipotles from jalapenos or anchos from poblanos.

Moving on.  This is a very common Thai dish, and strongly resembles a curry but without the use of coconut milk.  And since the name gives away very little, it is almost always a stir-fry of green beans (or long beans), often with meat, and usually with some kind of fresh pepper in there.  I absolutely love this dish, and until recently had been making it with red curry paste.  It was probably about 80% as good as if you use prik khing curry paste, but if you can find it I say go for the real thing because it has a certain complexity that red curry paste doesn't have.  And definitely don't hold back on the use of the paste, either.  I used a whole can, and didn't feel like it was overpowering at all.

This dish comes together really quickly, and despite having a relatively short list of ingredients it packs a wealth of complex flavors.  I guess that's because the work was already done preparing the curry paste; be thankful I'm not asking you to make your own... yet.


Pad Prik Khing Gai
By numerous sources

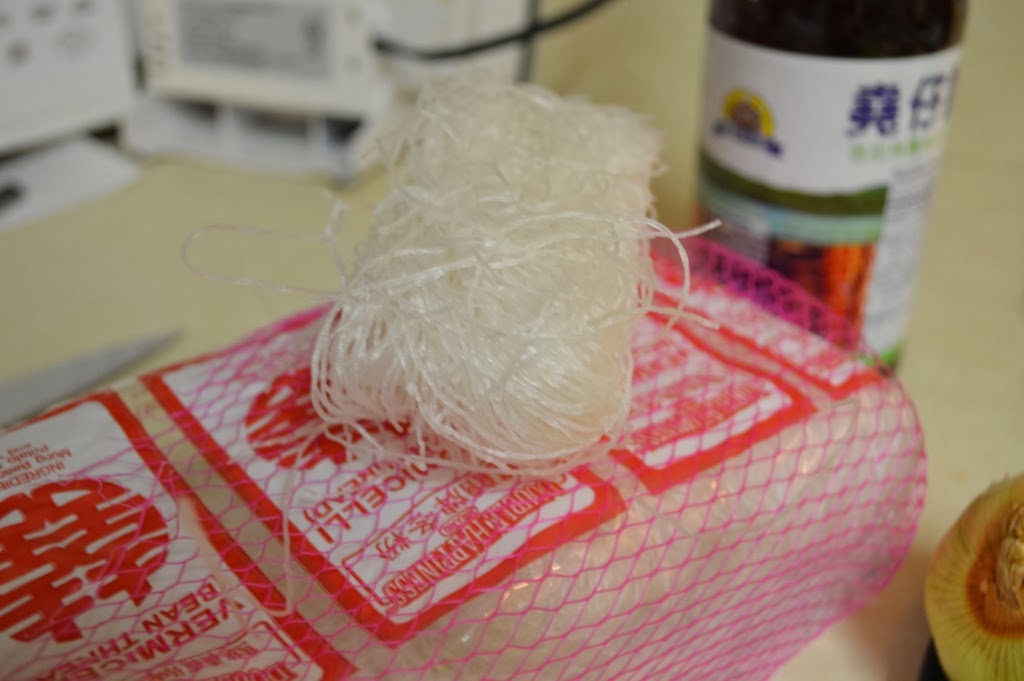
  • 1 4 ounce can prik khing curry paste (Maesri brand is fairly common)
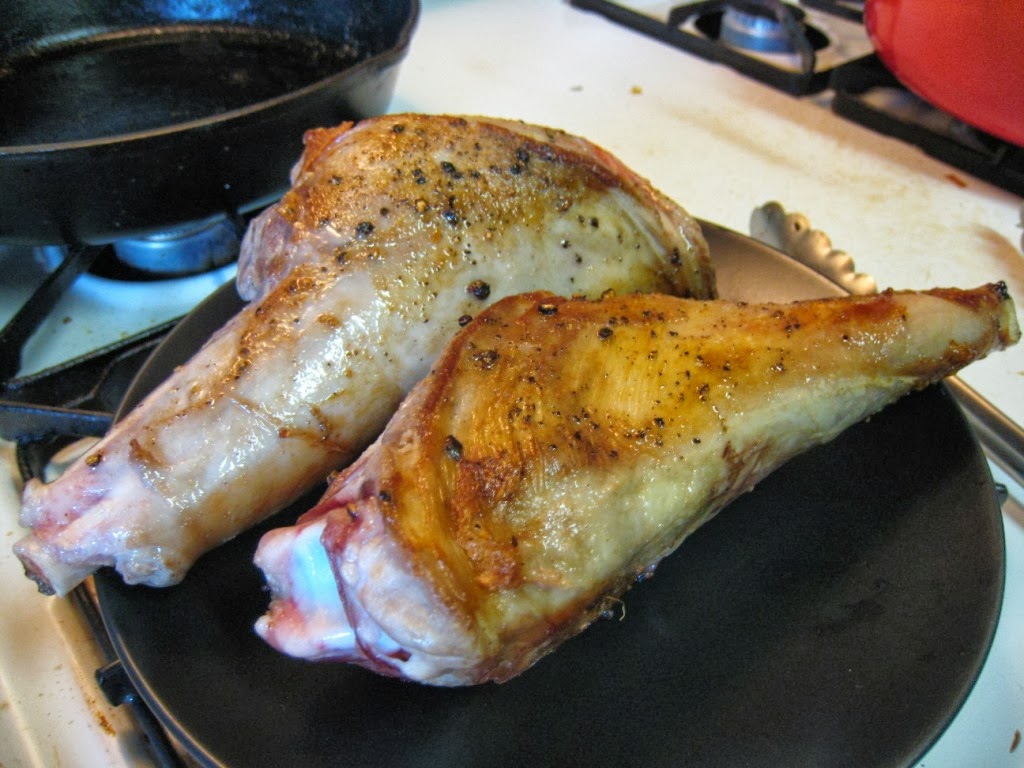
  • 1/2 cup chicken, sliced thinly
  • 2 cups green beans (or Chinese long beans), cut into 1-2" pieces
  • 1/2 cup water
  • 3-4 kaffir lime leaves, sliced thinly
  • 1/2 red bell pepper, sliced
  • 1 tbsp fish sauce
  • 1/2 tbsp white or palm sugar
  • 2 Thai chiles, sliced thinly (optional)
  • 1 tbsp canola oil


Gather up the fairly short list of ingredients.  Feel free to switch out the meat or the peppers for others, but definitely include green beans or long beans

Heat oil over medium high heat.  Add the prik king chili paste and fry for 1-2 minutes.  Now add the chicken (or whatever protein), coat with the chili paste, and let them cook until they are done.  If the pan gets too dry while the meat is cooking, add some water, a few tablespoons at a time.

Stir-fry the curry paste to bring out the flavors, and attempt to gas your friends out of the house.

Add the meat and stir-fry in the paste

Add the green beans, Thai chiles, and bell pepper slices and some more water, again a little at a time, until they are almost cooked.  Add the kaffir lime leaves, sugar, and fish sauce.  Taste and adjust the seasonings as needed.  Once the beans are fully cooked, serve over jasmine rice.

Stir-fry the remaining ingredients for a few minutes, adding water as necessary, then add the sauce components and serve immediately

Yum Woon Sen (Chile Lime Glass Noodles)

My first encounter with chile lime noodles was at a vegan food market, where it was framed as a gluten-free, animal byproduct-free meal.  As I ate it, I thought "this would be much better with some animal byproducts in it."  But all of the recipes I found were somewhat bland, Americanized versions of this dish.

Enter the real deal - yum woon sen, which is a Thai salad using mung bean noodles.  You've probably seen these before - they start off pale white, and when you cook them they turn translucent, earning them the name "glass noodles".  They're fairly easy to find, and not to be mixed up with rice vermicelli, which will cook up white, and though they are the same diameter, that's about all they have in common.  Glass noodles are chewy and have a much more neutral flavor, making them perfect for this dish.  And the Thais don't mess around with the whole animal byproduct thing - they thrown in fried, dried shrimp, and often ground pork (which I didn't add here, to try just the standard dried shrimp version).

In addition to getting to buy two new ingredients I had never purchased before, which is always fun, this dish surprised me by how easily it came together.  You don't really cook anything, in the traditional sense.  You basically just soak the noodles in boiling water, then crisp up the dried shrimp and peanuts, and toss everything together.  I was waiting for the stir-fry step the first time I made it, but it never came.  The end result was very healthy and fresh as a result, so now I see why this dish became popular.


Yum Woon Sen (aka Chile Lime Glass Noodles)
From ThaiTable.com


  • 5-6 sprigs cilantro
  • 1 2 ounce (dry) bundle mung bean noodles (aka glass noodles, clear noodles)
  • 1/4 cup dried shrimp
  • 1 tablespoon fish sauce
  • 1 tablespoon fried garlic
  • 1-2 limes
  • 1/2 sliced onion
  • 1/2 cup peanuts
  • 1/2 teaspoon sugar
  • 3 Thai chili pepper
  • 1 cup cut Chinese Celery, or regular celery if you can't find Chinese


If you can't find the Chinese celery above, just use regular celery.  But do at least keep the tops

This single bundle is all you need for the recipe posted here.  Don't get carried away, it will throw off the balance of ingredients

Rinse your vegetables well, and chop them to the right sizes.  They won't end up being cooked, so it has to be bite-sized and ready to go.

Take one of the 2 oz bundles from the noodle pack, and place in a large bowl with boiling hot water for 6 minutes. Strain the noodles and drain, then pour the noodles into a large mixing bowl and cut them with scissors randomly to make the strands easier to serve and eat.  Cut the Chinese celery into 1 ½ inch pieces. Slice onion, top to bottom to get crescent pieces. Chop cilantro and chili peppers.  If making your own, make the fried garlic by placing 6 cloves of garlic in a microwave-safe bowl and cover with 1-2 tbsp neutral oil, then microwave on high for up to 2 minutes, 30 seconds in 30 second increments until nicely browned and fragrant.

If using raw peanuts, fry peanuts in 1 teaspoon of oil over low to medium low heat until light brown and cooked, about 5-7 minutes. Remove peanuts and set aside. Fry the dried shrimp over medium heat until crispy and brown, about a minute, depending on the size of your shrimp. When the shrimp turns whitish, remove from heat and set aside.

Dry-fry the dried shrimp - this was a new one for me.  I found these in the refrigerated section of the Asian grocery store

Make the sauce / dressing - 1 tablespoon of fish sauce, 5 tablespoons of lime juice, and 1/2 tsp (or less) of sugar.  It should be more sour than salty; you should also take into account how salty the shrimp are. The role of sugar here is to round the flavors.

Add a tablespoon of fried garlic to the noodles and mix them. Fried garlic gives the noodles flavor. Add 5 tablespoons of the dressing to the noodles and mix well, reserving the last tablespoon to add only as necessary. Add the peanuts, dried shrimp, onion, Chinese celery, chili peppers and cilantro to the noodles. Toss well and taste. You may need more dressing, depending on water content of the noodles and the concentrations of your seasonings.

Toss all ingredients to combine, and you're done!  Minimal cooking necessary

Tuesday, October 15, 2013

Beer and Cheddar Soup

It may not be German, and it's certainly not healthy, but this was one of the most delicious soups I've ever eaten.  Made by a special friend, it was put together with precision, to ensure that everything came out perfectly.  With ingredients like beer, cheddar cheese, cream, and bacon, I'm not sure how this dish could possibly be bad, but thankfully it delivered on flavor, where it lacked in nutritional value.  Highly recommend this at an Oktoberfest party, or on a cold winter's night.  And definitely look for smoked cheddar if you can find it - it makes a huge difference in the flavor.


Beer-and-Cheddar Soup
From Food & Wine, Contributed by Jonathon Erdeljac

  • 1/3 pound piece of slab bacon, sliced 1/3 inch thick and cut into 1/3-inch dice
  • 1 celery rib, finely chopped
  • 1 small onion, finely chopped
  • 1 large jalapeño, seeded and chopped
  • 2 large garlic cloves, minced
  • 1 tablespoon chopped thyme
  • One 12-ounce bottle lager or pilsner
  • 2 1/4 cups low-sodium chicken broth
  • 4 tablespoons (1/2 stick) unsalted butter
  • 1/4 cup all-purpose flour
  • 1 cup heavy cream
  • 1/2 pound sharp yellow cheddar cheese, coarsely shredded
  • 4 ounces smoked cheddar cheese, coarsely shredded
  • Salt and freshly ground pepper
  • Garlic-rubbed toasts, for serving


In a large saucepan, cook the bacon over moderate heat until the fat is rendered and the bacon is crisp, 7 minutes. Using a slotted spoon, transfer the bacon to a bowl. Add the celery, onion, jalapeño, garlic and thyme to the saucepan and cook over moderate heat, stirring, until softened, 8 minutes. Add half of the beer and cook until reduced by half, 5 minutes. Add 2 1/4 cups of chicken broth and bring to a simmer.


In a small skillet, melt the butter. Add the flour and cook over moderate heat, stirring, until lightly browned, about 2 minutes. Whisk this roux into the soup until incorporated and bring to a simmer. Cook until thickened, about 8 minutes. Add the heavy cream, cheddar cheeses and the remaining beer and simmer, stirring occasionally, until thick and creamy, about 5 minutes. Stir in the bacon and season with salt and pepper. Add a few tablespoons of broth if the soup is too thick. Serve the soup with garlic toasts.


The cheddar soup can be refrigerated overnight. Rewarm gently and thin with additional broth.

Sunday, October 13, 2013

Spicy German Mustard

This mustard accompanies my soft pretzel recipe, both of which were made this past week for an Oktoberfest party.  I was amazed with how easy this process was - soak the mustard overnight in a few spices and vinegar, then blend.  Good lord, why have I been buying mustard at the store?  I know one reason - I hadn't felt like chasing down two different colors of mustard seeds until I decided that I had to try this, at least once.  And now mustard seeds will become a staple in my pantry, because I want to be able to make this at all times.

I thought this mustard was tasty - a bit tangy, slightly spicy, just a hint of sweetness.  I was expecting a darker, sweeter mustard, so I might tinker with this a bit to adjust the flavors to what I was hoping for.  But this was delicious in its own right, so I'm excited to pass this along to everyone with the pretzel recipe.


Spicy German Mustard
By Diana Rattray, About.com

Makes about 1 1/2 -2 cups
  • 1/4 cup yellow mustard seed
  • 2 Tbsp. black or brown mustard seed, heaping
  • 1/4 cup dry mustard powder
  • 1/2 cup water
  • 1 1/2 cups cider vinegar
  • 1 small onion chopped
  • 2 Tbsp. firmly packed brown sugar
  • 1 tsp. salt
  • 2 garlic gloves, minced or pressed
  • 1/2 tsp. ground cinnamon
  • 1/4 tsp. ground allspice
  • 1/4 tsp. dried tarragon leaves
  • 1/8 tsp. turmeric


In a small bowl, combine mustard seed and dry mustard. In a 1- to 2-quart stainless steel or nonreactive saucepan, combine remaining ingredients. Simmer, uncovered, on medium heat until reduced by half, 10-15 minutes. Try to be patient and cool the mixture as much as possible before pouring over the mustard mixture; it turns out that both heat and acid will dull the pungent heat developed by mustard seeds, but my guess is that heat will do it faster, while also killing a lot of the flavor.  From About.com:
"It is the chemical reaction between two compounds, myrosin and sinigrin, that combines to turn up the heat when the cells of the seeds are broken and mixed with cold water. "

So my suspicion is that the use of cold vinegar will allow for a slow reaction between these compounds for a while, but eventually it gets in balance, and can be kept refrigerated until the reaction peters out, yielding a stable final product.  If you want to experiment with this (and you can bet I do), try soaking two small quantities in water and vingear, pureeing both and tasting the difference.  I also plan to try experimenting with warm vs cool vinegar liquid poured over the seeds, as well as the total soaking time, to see if these things make a difference.

Anyway, let mixture stand, covered, at room temperature for 24 hours, adding additional vinegar if necessary in order to maintain enough liquid to cover seeds.  Process the seeds and mixture in a blender or food processor until pureed to the texture you like, which can take at least 3 or 4 minutes.  If it gets too thick after a few days, stir in additional vinegar.  Scrape mustard into clean, dry jars; cover tightly and age at least 3 days in the refrigerator before using.


Mustard, in 3 easy steps: 1: Mix up the vinegar with spices

2: Pour over the mustard seeds, and let sit for a few hours (up to 24).

3: Puree.


Soft Pretzels

Oktoberfest may have already come and gone, but to most Americans, they think it's still going through the rest of the month.  So to those of you who keep on partying and don't know why, I salute you.  Why not make some pretzels to celebrate someone else's recently passed holiday?

These pretzels were delicious, rivaling any mall store or ballpark pretzels.  As long as you have a couple of concepts understood, you can make your own delicious version of this at home.  I got the recipe from the show Good Eats by Alton Brown, and followed it to the letter.  I will only add more detail when we get to the part about the dough, which I think is important for success.

Also, you don't have to make pretzel shapes with this dough.  I stupidly forgot to take a picture, but with this dough I made 4 large, 4 small, and 4 pretzel rolls, which made for excellent sausage sandwiches.  Just shape them into ovals, let them rise in a towel, and then treat them as you would a pretzel-shaped version.


These went great with my spicy german mustard recipe, which will be an evolving page with updates as I tinker even more to get this exactly the way I want it.


Homemade Soft Pretzels
Recipe courtesy Alton Brown, 2007

  • 1 1/2 cups warm (110 to 115 degrees F) water
  • 1 tablespoon sugar
  • 2 teaspoons kosher salt
  • 1 package active dry yeast
  • 22 ounces all-purpose flour, approximately 4 1/2 cups
  • 2 ounces unsalted butter, melted
  • Vegetable oil, for pan
  • 10 cups water
  • 2/3 cup baking soda
  • 1 large egg yolk beaten with 1 tablespoon water
  • Pretzel salt


Combine the water, sugar and kosher salt in the bowl of a stand mixer and sprinkle the yeast on top. Allow to sit for 5 minutes or until the mixture begins to foam. Add the flour and butter and, using the dough hook attachment, mix on low speed until well combined. Change to medium speed and knead until the dough is smooth and pulls away from the side of the bowl, approximately 4 to 5 minutes. Remove the dough from the bowl, clean the bowl and then oil it well with vegetable oil. Return the dough to the bowl, cover with plastic wrap and sit in a warm place for approximately 50 to 55 minutes or until the dough has doubled in size.

Here's an important point - you'll get the best, fastest performance out of your yeast if you can find a nice HUMID place to put the dough, not just warm.  I forget where I picked up this trick, but I like to make a small "proofing" chamber out of a plastic tote I bought at the megamart, and put the dough bowl inside along with a small container (at least a pint) of boiling water.  This creates the unbelievable rising effect seen in these photos, which I kid you not are taken only 90 minutes apart, which actually had risen too much.

Note the size of the dough ball before rising.  Also note that there are no shear marks on the surface of this - it's fairly smooth, having been well kneaded until it was elastic and just slightly tacky

My proofing box - dough + boiling / steamy water = awesome.

This is what you would like to see, although maybe this was in there a bit too long


While the dough is rising, start preheating the oven to 450 degrees F. Line 2 half-sheet pans with parchment paper and lightly brush with the vegetable oil. Set aside.

Bring the 10 cups of water and the baking soda to a rolling boil in an 8-quart saucepan or roasting pan.

In the meantime, turn the dough out onto a slightly oiled work surface and divide into 8 equal pieces (definitely consider doing 16 pieces instead, the 8 pretzels this makes are just way too huge). Roll out each piece of dough into a 24-inch rope. Make a U-shape with the rope, holding the ends of the rope, cross them over each other and press onto the bottom of the U in order to form the shape of a pretzel. Place onto the parchment-lined half sheet pan.

Start with a nice long rope.  I had to roll it as shown to get an even diameter all down the length

I asked a German baker about the trick here, and he said "just bring the two ends up and let it come together".  That didn't really work, but I got it after a few tries.

It helps to look at a store pretzel while doing this.  You basically cross the tips over twice, and then press in slightly where the dough rejoins or crosses itself.


Place the pretzels into the boiling water, 1 by 1, for 30 seconds. Remove them from the water using a large flat spatula. Return to the half sheet pan, brush the top of each pretzel with the beaten egg yolk and water mixture and sprinkle with the pretzel salt. Bake until dark golden brown in color, approximately 12 to 14 minutes. Transfer to a cooling rack for at least 5 minutes before serving.


Before the bath, wash, and bake
Taking the first bath, before a quick rinse with some egg yolk and a sprinkle of sea salt
The final product!

Wednesday, October 2, 2013

Braised Lamb Shanks with White Beans

I've always wanted to master lamb shanks.  Filling, complex, rich with collagen, and easily portioned into undisputable gargantuan helpings you just can't argue with, they are far too underappreciated in this country.  I only know a few cultures that cook lamb shanks well - the Greeks, and the Irish.  I suppose the French can do it to, and that's what I had a run at with this recipe, kind of a take on a cassoulet but without a variety of different meats (or as many beans).

I made this recipe a few months ago and as a result have forgotten exactly where I found it, but I believe I scavenged it mostly from Williams-Sonoma and then modified the spice blend slightly, to produce more of an herbes de provence blend than just the original thyme and bay leaf mix.  My version had an overly thick sauce which would have benefitted from slightly more broth, but otherwise the flavor was so incredible that I almost phoned the last French bistro I ate in and asked for my money back.  Rest assured that I won't be ordering this out at a pricey restaurant any time soon - this probably cost me $30 out the door for two people, including meat from a top-end butcher and a bottle of wine, most of which ended up being drunk at dinner, as was the chef.


Braised Lamb Shanks with White Beans
Adapted from Williams-Sonoma Seasonal Celebration Series, Autumn, by Joanne Weir (Time-Life Books, 1997)


  • 3/4 cup dried small white, white kidney or cannellini beans (or 2 15 ounce cans if you’re lazy)
  • 2 Tbs. extra-virgin olive oil
  • 3 lamb shanks, each 1/2 to 3/4 lb.
  • 1 yellow onion, finely diced
  • 1 celery stalk, finely diced
  • 1 large carrots, peeled and finely diced
  • 3 garlic cloves, minced
  • 3/4 cup dry red wine such as Côtes-du-Rhône, Cabernet Sauvignon or Chianti
  • 1/2 cup chicken broth
  • 1 cup peeled, seeded and chopped tomatoes (fresh or canned)
  • 1.5 tbsp tomato paste
  • 1 tsp chopped fresh thyme
  • ¾ tsp chopped fresh rosemary, or ¼ tsp dried
  • 1-2 leaves chopped fresh sage, or ½ tsp dried
  • ½ tsp dried marjoram
  • ¼ tsp dried basil
  • ¼ tsp fennel seeds
  • ¼ tsp dried oregano
  • 1 bay leaf
  • Salt and freshly ground pepper, to taste
  • 1 tbsp chopped fresh flat-leaf parsley


If using dried, pick over the beans and discard any misshapen beans and stones. Rinse the beans, place in a bowl and add water to cover generously. Let stand for about 3 hours.  Drain the beans and place in a saucepan with water to cover by 2 inches. Place over medium-high heat and bring to a boil. Reduce the heat to low and simmer, uncovered, until nearly tender, 45 to 60 minutes. Drain well.  Or, if using canned beans, ignore that whole process and open 2 cans, rinse, and drain.

While beans are cooking (or being opened), prepare the herbes de provence by combining thyme, rosemary, sage, marjoram, basil, fennel, and oregano in a small bowl.


Meanwhile, in a deep, heavy stock pot over medium heat, warm the olive oil. Add the lamb shanks and brown on all sides, 10 to 12 minutes. Transfer the shanks to a plate. Add the onion, celery and carrots to the pan and sauté over medium heat, stirring occasionally, until the onion is soft, about 10 minutes. Add the garlic and cook, stirring, for 1 minute. Add the wine, broth, tomatoes, tomato paste, herbes de provence mix, bay leaf, and lamb shanks. Bring to a boil over high heat. Reduce the heat to low, cover and simmer until the shanks can be easily pierced with a skewer, 1 1/2 to 2 hours.


Add the beans, stir well, cover and simmer gently until the lamb begins to fall from the bone and the beans are tender, about 30 minutes more. Season with salt and pepper. Remove the bay leaf and discard.


Transfer the lamb shanks and beans to individual plates and garnish with chopped parsley.

Monday, September 16, 2013

Yellow Tomato Gazpacho

If you're one of the lucky few who's got an abundance of tomatoes coming from your garden, you may consider making gazpacho - a chilled Spanish tomato soup.  I found this on a quick search after coming upon 3 delicious, overripe yellow tomatoes, which I found slightly less bitter than red tomatoes.  However, I later made this recipe exactly the same way with normal tomatoes, and it came out just fine.  I have since made this dish a number of times with yellow tomatoes, which seem to have slightly less acidic flavor, and which really make for an impressive dish.

This dish travels incredibly well - I have served it out of a tupperware pitcher into disposable cups at least twice in my life, most notably when I was about ten, but more recently a couple of weeks ago.  It confused everyone the first time, but both times it was delicious.


Saturday, September 7, 2013

Athenian (Greek) Chicken and Potatoes

For some reason, in my home town we don't have diners - we have a lot of Greek delis.  I don't know how this happened, somehow the American restaurant icon got disenfranchised by a local demographic and the customers discover that they would rather have a gyros omelette over scrapple and chipped beef.  One of the staple dishes I grew up with was called Greek chicken, also called Athenian chicken in places that charged you a dollar or two more for the fancier wording.  Regardless, it's good, ol' fashioned comfort food - healthy, fairly mild, hearty - that I have tweaked a number of times until getting something vaguely reminiscent of what I used to eat as a child.  Enjoy!


Athenian Chicken and Potatoes
modified from Bon Appétit, April 1992

  • 1 4-5 pound chicken, quartered
  • 3-4 russet potatoes (about 2.5 pounds), peeled, quartered, lengthwise
  • 4 large garlic cloves, halved
  • 1 cup canned low-salt chicken broth
  • 1/3 cup olive oil
  • 2/3 cup fresh lemon juice
  • 1/2 tablespoon fresh rosemary, finely chopped
  • 2 teaspoons dried oregano, crumbled – perhaps slightly more
  • Lemon wedges, for serving

Preheat oven to 375°F. Arrange chicken (skin side up), potatoes, and garlic in large roasting pan. Place at least one half of a garlic clove under chicken pieces, if possible.  Season with salt and pepper.  Pour broth over.  Whisk olive oil, lemon juice and oregano to combine.  Pour evenly over chicken and potatoes.


Bake until chicken is cooked through and golden brown and potatoes are tender, basting every 20 minutes with pan juices, about 1 hour 5 minutes.  Tent with aluminum foil, bake for another 10 minutes.  Serve with lemon wedges.  If potatoes are not browned, remove chicken and roast at 425 until cooked, up to 20 minutes more.

Serve with something green and make yourself a nice homecooked meal


Monday, September 2, 2013

Chicken Riggies

Update 12/24/2018: after making this dish again from my own recipe, I have realized that I am now a bit smarter about the process. So I updated to remove a couple of unnecessary ingredients and fix the method to be better all around.

Since the dawn of homo sapiens, when we first stood tall, emerged from our caves, and embarked on the great human experiment, we have begun to seek the answers to the great questions in life.  "Why are we here?  Do we have a purpose in life?  And what, really, is a riggie?"

Well, at long last one of these questions can be answered.  A riggie, coming from the Italian word "rigatoni", which in turn translates as "tube of extreme deliciousness" in a language I have not yet heard of, is a dish coming from the Utica / Rome area of upstate New York.  Only there would you take a tomato cream sauce, not unlike a vodka tomato sauce, but instead add both sweet and hot peppers, as if you were about to slather this stuff onto a cheesesteak or a hotdog, before going ahead and throwing in a few select proteins to toss with your pasta as originally planned.  The first time I encountered this dish was in Lansing, NY at Rogue's Harbor brewing company, who serves this under a section of NY state specialties.  I wish I could personally extend my thanks to the great man or woman who, on what must have been a very cold, somewhat alcohol-fueled night, decided to turn an otherwise classy, rich dish into a slightly less classy yet unbelievably satisfying assault on the senses.  Sweet, tart, velvety, warm, and hearty - a perfect meal for pulling the kids out of the snow, sloshing into wooden bowls, and mowing through by a roaring fire while you warm your bones.


I tried this dish from a recipe I dug up online few years ago with limited success - things just didn't come together, and the flavors weren't right.  The sauce broke, it wasn't the right mouthfeel, and it just lacked that well-rounded flavor that I was expecting.  But now, after a few more years of cooking and recognizing some flaws in the original recipe, I believe I have tweaked it into something altogether better, maybe suitable for entering into "Riggiefest", which I swear I am not making up.


Chicken Riggies
from various sources, fused together by me

  • 1 tbsp olive oil
  • 1 tbsp butter
  • 4 cloves garlic, minced
  • 8 tablespoons minced shallot (3 medium) or 1 small onion, minced
  • 1.5 pounds skinless, boneless chicken breast meat
  • salt and pepper to taste
  • 1 (4 ounce) jar sweet red peppers or cherry peppers, drained and julienned
  • 3-4 ounce jar hot banana peppers or cherry peppers, drained
  • 1/2 cup fresh tomato sauce
  • 2 tbsp dry sherry
  • 10 pepperoni
  • 4 ounces heavy cream
  • 8 ounces uncooked rigatoni pasta
  • Grated parmesan (optional), for plating
  • Minced parsley (optional), for plating
Prep your setup.  Get the shallots and garlic minced and together in a small bowl.  Go for shallots instead of onions - live the dream.  It does make a lot of difference.  Cube the chicken into bite-sized pieces, about 1" to a side.  Not so small that they won't hold up in what is essentially a stew, and not so large that you have huge hunks of flesh floating around in there.  Chop up your peppers, which should be equal parts sweet and hot (hence the bold to differentiate above).  You could use roasted red peppers, but I prefer sweet cherry peppers.  For the hot, what I originally had and still prefer most is hot banana pepper rings, although you could use hot cherry here and roasted red for the sweet.  Whatever suits your taste, but keep the ratios the same.

In a large cast iron saucepan, heat oil and melt butter over medium heat.  At same time, start boiling water for your rigatoni. Add the garlic and shallots to the pan and saute until soft, then add the chicken, season with salt and pepper to taste, and saute for 8 to 10 minutes, or until halfway cooked. Don't brown the meat, just keep stirring until it's no longer pink.


Add peppers and stir in tomato sauce, reduce heat to low and simmer about 10 minutes. Now start cooking your rigatoni.  Back in the main pan, add the sherry and simmer for another 10 minutes.


Add the pepperoni and the heavy cream, and cook for 5 minutes. Do not use anything lighter than 'light' whipping cream - no half-and-half, no whole milk mixed with cream, nothing like that.  If you try to add anything but actual cream, this sauce will break, forming little fat bubbles separated from a watery mess.  So don't think that you can come up with a low-fat substitute for this - I've already tried, plus I cut the fat down in the first step, which originally called for double the amount of oil and butter.


When the pasta is just barely al dente, if not slightly before, set aside about a cup of the cooking water, drain the pasta, and immediately toss it into the sauce. Toss this together to finish cooking the pasta for 1-2 minutes in the sauce, adding in a few tablespoons of the reserved rigatoni cooking water to thicken and help the sauce cling to the pasta. Feel free to add more of the water if the sauce is still too thick, but not so much that it will become loose again.


After adding the cornstarch, observe how thick this is.  This picture from an earlier attempt.

To serve, plate into bowls, possibly with shredded parmesan, and top with finely minced parsley.  I took mine plain.  Try to find something healthy as a side, like a salad or something green.


Sunday, August 25, 2013

Sausage and Rice Stuffed Peppers

It's been 100 recipes, and I'm still alive.  And hopefully, you are too, and maybe even better off for checking in here from time to time.  So for this one, I'm not going to present anything too extreme, just something delicious, healthy, and fairly easy to make.  And for a change of pace, I didn't even use a recipe for this one - just threw some things together from memory in a way that I thought would work out well, and it turned out that it did.

Today we contemplate the stuffed pepper.  Who would ever think to take a large, cavernous vegetable, hollow it out, cram it full of goodness, and then roast it and treat it like an edible bowl?  Well, I don't know, but let's hope that he was given a thousand virgins and quite a few goats for his discovery.  You could do this with tomatoes, peppers, or eggplant or squash if you really knew what you were doing.  But as an easy start, let's focus on the most forgiving of all of these from a cooking and structural integrity standpoint - the pepper.  If you don't like bell peppers, then I have nothing for you.  But consider that you may only dislike green bell peppers, which are slightly less sweet, and consider giving this a try.


Bell Peppers Stuffed with Sausage and Rice
by me

  • 2 large red bell peppers
  • 1/2 lb Italian sweet or hot sausage, removed from casings if present
  • 1 small zucchini, diced
  • 2 cloves garlic, minced
  • 1 small onion, diced
  • 1 rib celery, diced
  • 1 green onion, sliced thinly
  • 1/2 c coarse breadcrumbs
  • 2 oz firm aged cheese, such as Parmesan or Asiago, grated
  • 1.5 c cooked brown (or white) rice
  • 2 tbsp olive oil
  • Salt and pepper
  • tomato sauce or aged balsamic vinegar, for plating
  • 1 tbsp parsley, minced, for plating
The peppers loaf about lazily on the countertop, unaware of their fate.

Preheat your oven to 400 deg F.

Begin by halving the peppers lengthwise, removing the core and seeds, and cutting away as much of the white membrance as you can (this is bitter, and also takes up space).  Now, in a large saute pan over high heat, brown the sausage in 1 tbsp olive oil, breaking up with your spoon into small pieces.  When browned, remove from pan and drain on a paper towel, and saute zucchini, garlic, onion, celery, and green onion in the next 1 tbsp of olive oil.  Remove to a large bowl.

In the meantime, take a small frying pan and heat the last 1 tbsp of olive oil.  Toast the breadcrumbs if they're not already toasty, and set aside.

Now, the rest is fairly straightforward.  Take everything you've got except the peppers themselves and the breadcrumbs, and stir them together in a big bowl.  Taste, and season as needed with salt and pepper.  Try not to just stop here and eat the whole thing, because you will probably want to.  But we must forge ahead - now stuff this into the pepper halves, packing in the filling somewhat densely and mounding up slightly.  Don't get so crazy that it's spilling out, because next you have to sprinkle on the toasted breadcrumbs.

The filling, resting before an epic journey in a hollowed out pepper through the fires of Mt. Ofen.

The peppers, packed and ready to go.

In a reasonably sized glass baking dish, brush a few drops of olive oil onto the bottom and situate the pepper halves.  Toss in the oven for about 30 minutes, until peppers are soft and starting to brown at the edges, and bread crumbs are brown on top.

To serve, either place on a bed of homemade marinara sauce, or drizzle with balsamic vinegar, as I have done.  I tried this both ways and preferred the tomato sauce version, but both are going to impress people.  Sprinkle with minced parsley, and serve.

Exhausted from their journey, the peppers lie unsuspectingly before hungry predators.

At last, the stuffed pepper has come to its final resting place

LinkWithin

Related Posts Plugin for WordPress, Blogger...